
Sound design in Form
There is currently a Native Instruments contest asking you to create a track, with a suggestion of using FORM, using samples by Deru, who made a nice video about using FORM for live performance and sound design.
Now FORM has become one of my favourite synthesizers. The concept behind FORM is taken a sample, analyzing it for its pitch information, and uses that to resynthetize sound. It is based on the PSOLA algorithm used to generate synthesized voice, and is (very very broadly) similar to granular synthesis. The resynthesis has some pretty awesome curve control (how fast the algorithm scans through the original waveform) and overall shaping parameters (FM, some other weird waveform stuff, some formant stuff which I don’t understand either but sounds awesome). This is then coupled with some standard filters, envelopes, LFOs and effects, alongside a fresh dose of the semi flexible modulation routing NI has been using in their last couple of synths and effects.
While it’s CPU usage is quite high, it is such a malleable and good sounding synth that is has become my second most used synthesizer besides Massive. Inspired by the samples posted for the contest, I have been designing a few “full-fledged” sound presets using FORM in the last few days, and want to share some of my tricks. You can see the whole procedure in this video I posted on youtube:
Getting some input samples
The first thing I do is gather some samples to feed into Form. They don’t need to be high quality or perfect or good-sounding, but a variety of sounds is interesting: spoken phrases, field recordings, single notes, drum beats. Of course if you are going for an instrumental sound, something with a pitch makes your life much easier, but really, anything goes.
I usually use already existing synths or samples, or previous form patches, and record the output in ableton live. I then clip and trim them to eliminate silence, name the cut clip, and then bounce it (using cmd-J). Live bounces audio as a normalized aif file, and adjusts the clip in live to the correct volume. This is perfect for our use, since we will have a normalized .aif file to import into FORM.
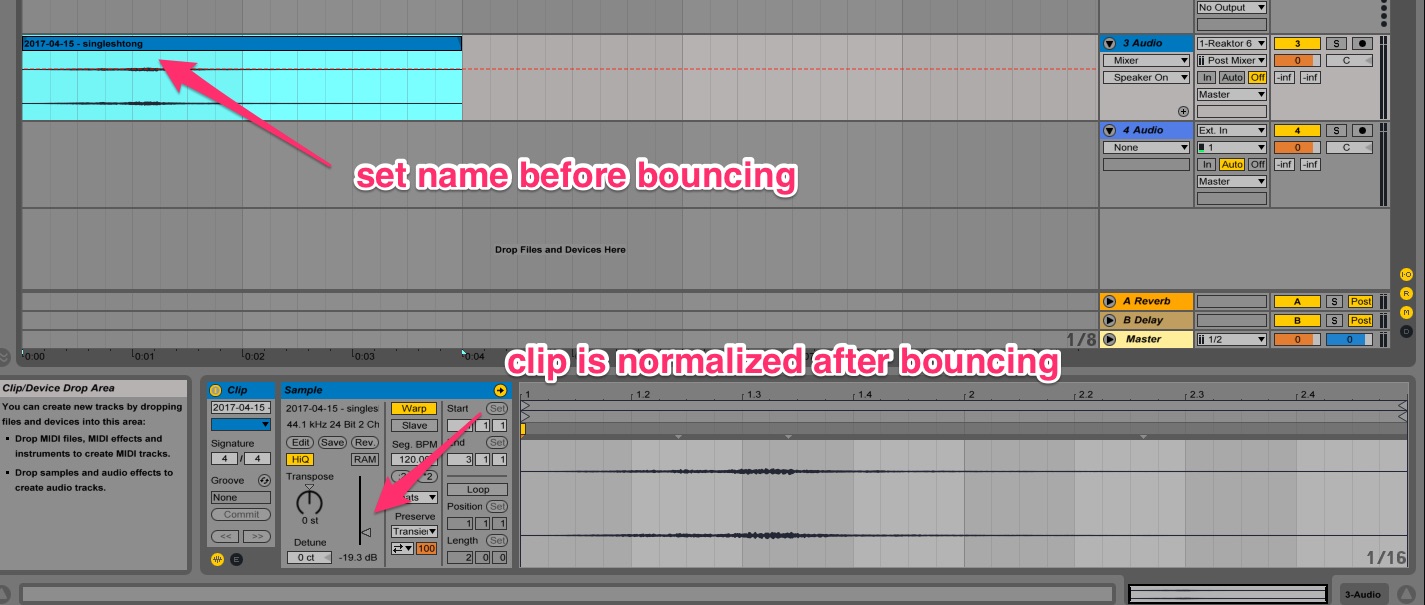
FORM references the location of the sample on disk when you save a preset. It’s thus very important
to save the samples used for your FORM presets into a location that will get backed up and is easy to find.
I use the right-click menu in ableton to show the sample in the explorer (or finder) on mac, and
copy the sample into its final destination folder (in my case Documents/Native Instruments/Maschine 2/Samples/FORM One Shots).
Finally, just drag and drop the sample into FORM into the Sample Select window.
Setting up and naming the macro knobs
The second thing I do before creating a preset is set up some names and settings for the modulation macros. While I don’t have any idea yet of what the sound will be like, naming the macro knobs and setting up their polarity makes it very easy for me to add them to the sound as I go along. If I leave them blank, I will usually be too lazy after coming up with a good sound to go back and assign them.
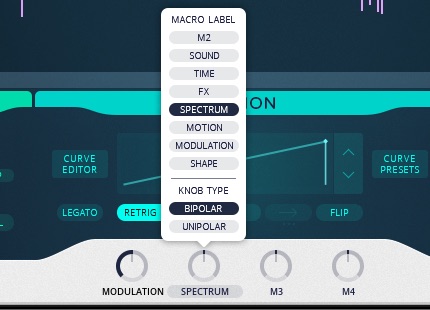
The macro knobs are very important to me because I know that in 5 months, when I come back to a preset I designed, I will have no idea what knobs are interesting to tweak, for which ranges, and why. Since I will be scrolling through a bunch of presets in search of inspiration or a matching sound, I want to quickly see where a sound can take me without having to deconstruct it. That is why I try to assign each and every macro knob to as many parameters as I can to make the sound tweakable and expose its possibilities.
This doesn’t mean necessarily that I intend the sound to be tweaked that way, it is more of a table of contents to the possibilities of the preset. The ranges and individual modulation amount will most probably be tweaked when the preset is used in the context of a production.
Shaping the sound in three phases
In FORM, I usually work in 3 phases: control the waveform scanning, shape the waveform sound and finally sculpt the sound as with a subtractive synth.
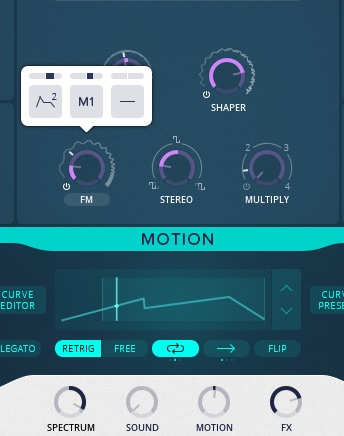
1. Shaping the sound shape with the curve editor
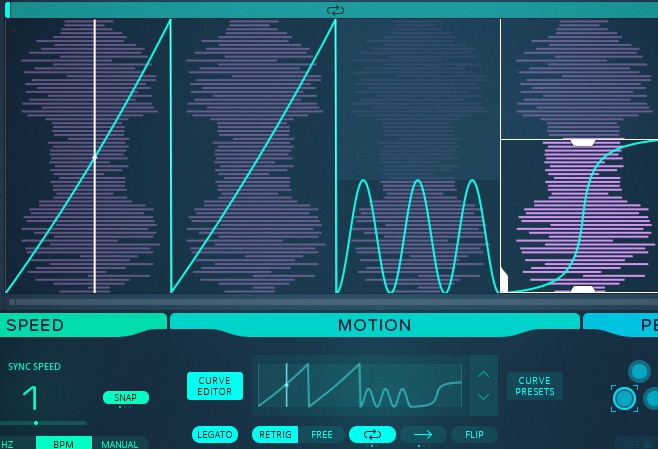
I first design a general soundshape using the curve editor. This is the most powerful way of shaping the sound in this synthesizer, and while remotely comparable to choosing an oscillator in other synthesizers, it really is quite unique. I often use a very simple curve form, maybe even keep the default ramp, and rely entirely on the underlying sample and the shaping section in FORM. This makes FORM quite similar to a standard sampler, instead that the sample is resynthetized and immediately in pitch.
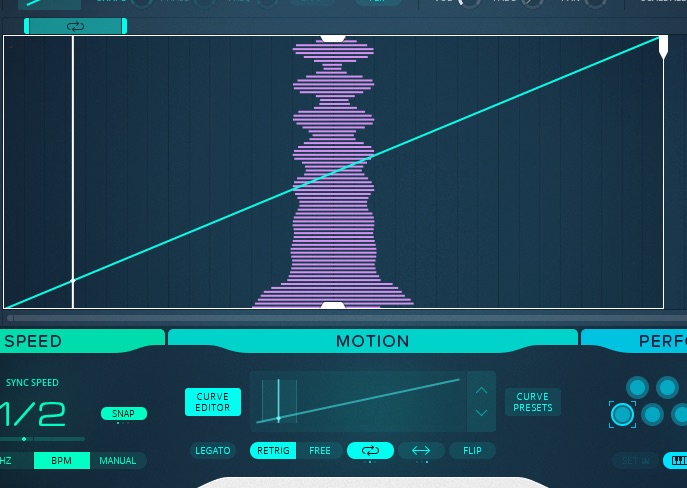
It is also much fun to come up with complex looping scans through the waveform. This can lead to nicely evolving pads, or rhythmic sounds. The difficulty here is to synchronize patterns (which often arise from a rhythmic texture in the underlying sample) to tempo or make them fit into a track. It is something that DERU in his video embrace, playing with scan speeds and letting them evolve over a track. Using the snap to BPM option of the scan speed, it is also possible without too much work to turn the curve into a tempo-synced rhythmic pattern, especially if the original material is not too rhythmic in nature.
I often assign the “Modulation” macro knob to the scan speed when a sample is looped, as increasing the loop speed leads to a more LFO like sounding sound.
2. Shaping the sound using the OSC controls
This is my favourite part of FORM. The resynthesis algorithm can be influenced by different shapers, FM and formant options. These knobs are full of creamy goodness and just a joy to use. I will automate them with envelopes, velocity, LFOs and macro knobs (I really wish there were 4 or more modulation slots for each parameter), and turn the raw sound coming out of the sampler into something mellow, or harsh, thin or warm, bassy or trebly, and for some magical DSP reason it always sounds like butter. The resynthesis part of FORM is actually visible in the core cells making up the ensemble. The waveform analysis isn’t, and I suspect that it’s not mostly for IP reasons, but rather that it was way too painful to program in core and they thus put a C++ cell in there.
My favourite knob here is definitely the “Shaper” parameter, which makes everything warm and sound like tape saturation. I use the “FM” parameter as my goto tweak to brighten up the sound before darkening it back down with the LP filter.
3. Shaping the sound using subtractive synthesis
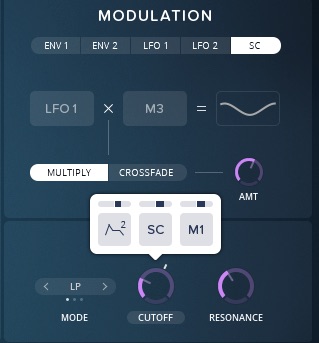
The final part of sound design is probably the least interesting, and it is shaping the sound using the inbuilt filters (one LP/HP/Notch, and 2 parallel bandpass filters). Because the sound at this point is already so rich, I often leave all the filters untouched, and just add a touch of reverb and delay. However, if I have a sample with a lot of high frequencies, or brightened up the sound using the FM and Multiply knobs, I will often put a standard LP filter on it, and modulate it in all the conventional ways. Of note is the availability of a sidechained modulation, where you can multiply say an LFO with a macro knob.
The inbuilt compressor is nice to get right of peaks that are too harsh, and the saturation option of the bandpass filter chain is quite effective and subtle.
Layering sounds in FORM
At this point I usually make sure I assigned velocity and all modulation knobs for the current sound, and move on to the next sound layer inside the current preset, using the little keyboard on the bottom right. I sometimes just copy the current sound, but more often than not just start from scratch. All the sound layers in the bottom right share the same underlying waveform, but can differ in every other possible way.
You can also use the multiple layers in the bottom right to stack sounds up, which is an option I haven’t used very much yet. You can for example layer a short pluck with a longer delayed sustain phase, and create complex sound textures this way.
I discuss more little subtle things in the video, and I plan to revisit FORM in a future blog post when I have spent even more time with it, I am sure there are a lot more nice things to discuss.